The use of a solar fence system has been one of the most effective means of ensuring security to property and will save a lot of electricity. Solar fences are an intelligent and eco-friendly solution, whether they are used in farms, residential areas or industrial areas.
But if you are new and you do not know where to begin do not worry. This step adieu will take you through the whole process of installation step by step, starting with the preparation down to the setup. And yes, you do not have to be tech savvy to do it right.
A solar fence is also an electric fence which is powered by solar. It is made of solar panels, fencing wires, an energizer and grounding rods. The usage of these fences is very common in agricultural farms, military areas, and residential properties to stop any intrusion.
These systems are also suitable in areas with poor sources of power mainly in remote locations due to the source of power which is solar.
It is better to understand why a solar fence is a preferred choice to get into the installation:
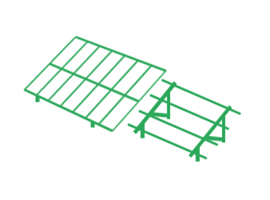
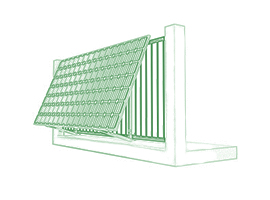
Firms such as Corigy have made the mounting part very easy, especially since it provides trustworthy vertical mounting brackets to effectively install solar fencing structures. These also are easy to align and they perform well hence the installation is made very easy.
Before beginning, make sure you have the following:
Start by selecting a suitable site for installation. Look for:
This location will become the control hub for your solar fence system.
Sketch the fence route before installing the posts. Decide:
Make sure the layout accounts for gates or entry points.
Pro Tip: Always keep the energizer in the center of the fence route for balanced energy distribution.
Using a post driver or digging tool, fix the fence posts along the marked path.
Once the posts are in place, you're ready to string the wires.
This is where things can be simplified using a bifacial solar panel with vertical mounting brackets. Corigy offers a durable solar fence vertical mounting solution that ensures firm placement of your panels with minimal tools.
The process is straightforward:
Make sure the panel is turned as per the sun and that it is tightly connected so that it does not wobble on shaking wind.
When the panel is secured, what you need to connect it to next is a deep-cycle battery, and this is where solar energy is stored to be used at night or during cloudy days.
Steps:
To prevent the waste of energy, use quality connectors. It is also best to protect the battery and energizer with rain and direct sun.
Now comes the physical fence. Begin to coil the wire around the post starting in one corner and continuing in a round way.
Always leave some slack at the end so you can connect it to the energizer later.
Grounding ensures the fence delivers an effective jolt when touched. It's crucial for the system's performance.
Steps:
A poorly grounded system will result in weak shocks or system failure.
Now, connect the fencing wire to the energizer's hot terminal. Make sure:
A properly working solar fence should read around 3,000–5,000 volts on a meter.
Walk around the perimeter and use a fence tester to check voltage at multiple points.
Make sure the system is active both day and night. The battery should be charged and the energizer working consistently.
Solar fences need very little upkeep, but regular checks will ensure peak performance:
Corigy 's mounting brackets are corrosion-resistant, which helps reduce long-term maintenance.
Even though the installation is simple, there are mistakes beginners often make:
Avoiding these can save time and extend the life of your fence system.
It is not necessary to make installing a solar fence complicated. When done properly with appropriate tools and recommendations it can be a painless procedure that is cost effective and provides good security. By selecting dependable parts such as vertical mounting brackets made by Corigy you will create a system that will out last and operate reliably under all conditions.
Solar fence is a long-term and cost-effective investment, whether you are setting up the system as a new one or merely upgrading it.
So take the leap, go solar—and build your fence the smart way.
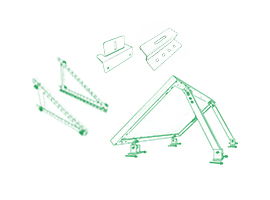
Corigy Solar Ground Mounting Racking System Structure is widely applied for landfll, open space or sloping terrain, etc, Diferent kinds of material can be offered for any needs, such as galvanized steel, anodized aluminum and ZAM materials.
Flat roof solar mounting systems offer robust support and easy installation for solar panels on flat roofs. These systems ensure maximum energy capture, durability, and cost-efficiency, making them ideal for residential and commercial properties. Corigy flat roof solar panel mounting system, such as ballast mount, east-west ballast mount, etc. Contact us to learn more!
Install solar panel on the metal roof by standing seam, klip-lok, L foot or other clamps.
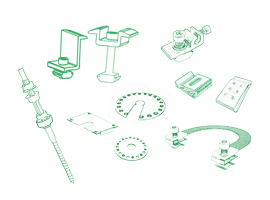
Solar mounting accessories such as end/mid clamp, cable clip, grounding items, etc.

CORIGY SOLAR, 15 years experience of research, manufacture and sale of solar energy system. We are always trying to provide the best support for you, including fast response, cost, QC, design, distributor support.
Phone
0086-592-6883200Location
No.893,Haicang Avenue,Haicang District,Xiamen City,China.

 IPv6 network supported
 English
 español
 한국의
한국의