Fitting the solar panel brackets to your roof is the foundation of a sound solar energy system. Installing solar panel brackets correctly ensures your panels stay stable, weather-resistant, and effective.
Whether you are an at-home, DIYer or a first-time solar adopter, this guide provides useful instructions, safety tips, and professional insights to help you get a safe and long-lasting installation under your belt.
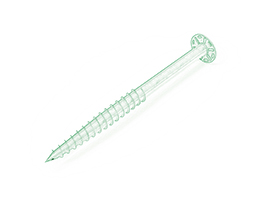
Solar panel brackets are metal holders that secure your solar array to your roof. They support the panels and assist in the maximization of energy.
Types of Brackets
The right bracket type depends on your roof material—such as asphalt shingle, tile, metal, or flat roof. Purchasing the right bracket enhances the performance and durability.
Before installing the solar panel brackets on your roof, consider the following crucial points on the safety of installing your solar panels:
Complex roofs, steep slopes, or weak structures are better left to trained installation crews.
You will need a good ladder with a stability device, a power drill that includes the right drill bits, a tape measure, a chalk line to draw straight lines, and a socket tool to tighten the bolts. These simple tools are used to measure well and to fix everything in place.
Make sure you have all the required installation components, such as brackets and rails, flashing, and waterproof sealant, lag bolts, and a complete assembly kit of mounting hardware. It is these materials that literally keep your solar panels secure.
Alignment can be simplified with a laser level, and a rubber mallet can help with light adjustments without breaking anything. These are optional tools, but may help the installation process to be more effortless and quick.
PPE on, roof inspected, tools prepared, and weather checked beforehand. A good start that features all preparations makes the installation more effective and harmless.
Begin locating the rafters of the roof with the help of a stud finder. Mark each spot clearly. Ensure that the distance between the points is balanced as this prevents excess weight of the panels irresponsibly distributed over the roof.
Flashing is essential in that it prevents water. Slide the flashing under the shingles and then sealant should be used along the edges. This keeps your roof safe by covering holes of bolts and eliminating leakages.
Now make small pilot holes in the rafters at which you have made your marks. Fasten the brackets with heavy and strong corrosion-resistant lag bolts. Screw them hard though not excessively tight because it will ruin the wood.
The level ensures that all the brackets are in perfect position. Before tightening, the bolts tighten, twice. Any slight torsion may cause tearing to the panels after installation.
Lastly, use the mounting rails and fit them to the brackets. Ensure that the distance is equal to the size of your solar panels. Ensure that the rails are straight, firm and prepared to take the panels.
To ensure that your installation is safe and complies with all the necessary regulations, always take into account your local building codes, take necessary permits, and thorough instructions on your part as the manufacturer. The actions will allow you to prevent errors and leave your setup accepted and secured.
It is also beneficial in ensuring that the system is checked after installation. Conducting regular check-ups will help to detect minute problems at their initial stage and have your brackets, rails, and roof in a good state and in full conformity with the requirements of safety standards.
When your roof is very steep, or strange shaped, or electrical work you are hesitant about is required in installation, then it is better to outsource. Such cases may be dangerous and difficult to manage alone.
A professional will install the job more quickly, and assure that all of this meets the local regulations. They equally offer warranty coverage, in case something happens in future, then you are insured. It is a safer stress-free alternative in case the job is too big or complex.
Once you have brackets on, you should make sure you are checking things now and then to maintain them in favorable condition. It is also a habit worth getting into to check whether there are loose brackets, old sealant, or any kind of debris accumulating around the panels. Such minor examinations will not consume much time but can help to avoid larger issues in the future.
Watch also the early indications of destructive work, such as water stains on the roof, slightly tilted-looking panels, and peculiar noises in a windy place. The early detection of such problems allows easier repair and prevents your system from being inefficient.
Proper steps to install solar panel brackets on your roof safely and correctly make all the difference in performance and lifespan. From safety gear and tools to careful measurement and alignment, each phase matters. Choose the right method for your skill level, and when in doubt, consult an expert installer.
For more expert insights and installation resources from Corigy, explore our solar guides, or contact our team for tailored support.
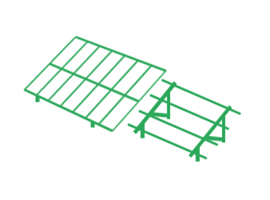
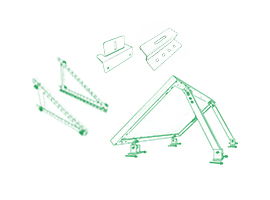
Corigy Solar Ground Mounting Racking System Structure is widely applied for landfll, open space or sloping terrain, etc, Diferent kinds of material can be offered for any needs, such as galvanized steel, anodized aluminum and ZAM materials.
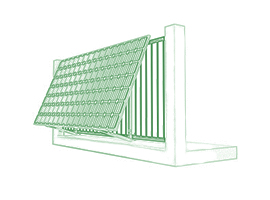
Flat roof solar mounting systems offer robust support and easy installation for solar panels on flat roofs. These systems ensure maximum energy capture, durability, and cost-efficiency, making them ideal for residential and commercial properties. Corigy flat roof solar panel mounting system, such as ballast mount, east-west ballast mount, etc. Contact us to learn more!
Install solar panel on the metal roof by standing seam, klip-lok, L foot or other clamps.
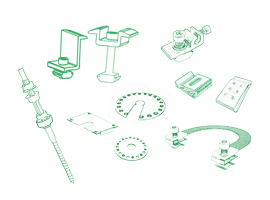
Solar mounting accessories such as end/mid clamp, cable clip, grounding items, etc.

CORIGY SOLAR, 15 years experience of research, manufacture and sale of solar energy system. We are always trying to provide the best support for you, including fast response, cost, QC, design, distributor support.
Phone
0086-592-6883200Location
No.893,Haicang Avenue,Haicang District,Xiamen City,China.

 IPv6 network supported
 English
 español
 한국의
한국의