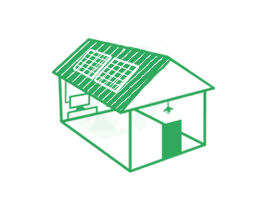
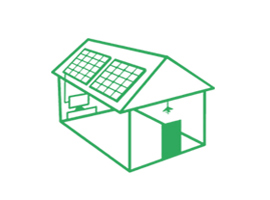
The technology is a flat roof mounting system that turns neglected rooftops into sources of clean energy power. Unlike pitched roofs, flat surfaces (typical of commercial/industrial buildings) require special engineered solutions to consider the issue of weight, drainage of water, and the force of the wind. This thorough guide will dive into the type of systems, installation procedures, waterproofing that is the best practice and the most important FAQs so that your solar project will be able to provide you with the optimal ROI without eating away at the integrity of the roof.
Real-Life Effect: A Chicago School District reduced their energy bill by 60 percent and instead of spending money out of the budget in energy; they spent money on direct classroom resources.
Despite the name, flat roofs have a subtle 1°–5° pitch ("fall") for drainage. Core layers include:
Failure Prevention Tip: Always verify membrane age/condition before mounting solar. Brittle or patched membranes risk leaks.
Applies a concrete block or paver as support to hold panels.
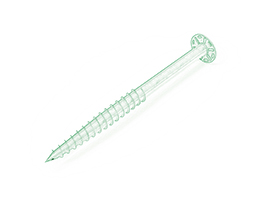
It is fixed with bolts fixing through roof substructure.
Combines ballast with limited strategic fasteners.
Analogy: The shoe analogy is an expected solution to the mount selection: the ballasted slip-on shoes (easy version), the mechanical highway boots (secure version), the hybrids are the all-terrain sneakers (versatile version).
Solar mounts must integrate with waterproofing:
Important Protocol: Seal all the permutations before and after the installation of the bolts with 2-part liquid sealant such as polyurethane.
Q: What type of mounting system is best for a flat concrete roof?
A: Mechanically attached systems are superior for concrete. Concrete’s compressive strength securely anchors bolts, while its mass counteracts wind uplift. Ballasted systems add deadweight unnecessarily (concrete roofs already handle 300+ kg/m²). For seismic zones, use flexible neoprene washers to absorb movement.
Q: How are flat roofs built to handle solar mounts?
A: Modern flat roofs are engineered "solar-ready" with:
Q: How do you waterproof a flat roof under solar mounts?
A: A 3-layer defense:
A flat roof mounting system with the right design can maximize energy generation without detering the health of a roof. Choosing the proper type (ballasted, mechanical, or hybrid) of the ground mount ensuring waterproofing and following the structured installation, you will get a powerful asset that will generate income.Partner with engineers who understand both solar dynamics and roofing science—like Corigy’s certified team.
Why Choose Flat Roofs for Solar? The Strategic Edge
Flat Roof Construction: The Hidden Engineering
Flat Roof Mounting Systems: Types, Pros & Cons
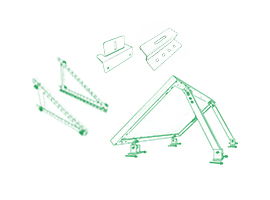
Ballasted Systems: The Non-Penetrating Solution
Mechanically Attached Systems: Maximum Stability
Hybrid Systems: Balance of Strength & Simplicity
Installation: A Step-by-Step Blueprint
Phase 1: Roof Assessment
Phase 2: Mount Assembly & Positioning
Phase 3: Panel Integration & Wiring
Waterproofing: Your Roof’s Lifeline
FAQs
Always retrofit older roofs with reinforcement mats before adding solar.
Moisture that is concealed is caught by infrared scans done annually.
Maintenance & Longevity: Protect Your Investment
*Proactive care extends system life to 30+ years—matching solar panel warranties.*
Conclusion
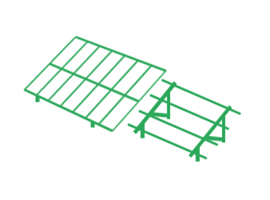
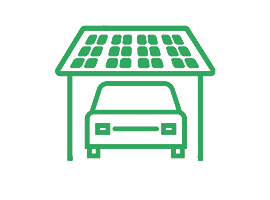
Corigy Solar Ground Mounting Racking System Structure is widely applied for landfll, open space or sloping terrain, etc, Diferent kinds of material can be offered for any needs, such as galvanized steel, anodized aluminum and ZAM materials.
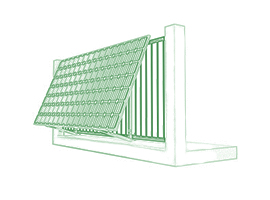
Flat roof solar mounting systems offer robust support and easy installation for solar panels on flat roofs. These systems ensure maximum energy capture, durability, and cost-efficiency, making them ideal for residential and commercial properties. Corigy flat roof solar panel mounting system, such as ballast mount, east-west ballast mount, etc. Contact us to learn more!
Install solar panel on the metal roof by standing seam, klip-lok, L foot or other clamps.
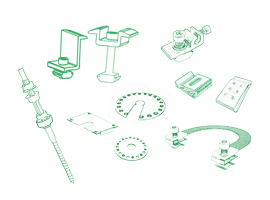
Solar mounting accessories such as end/mid clamp, cable clip, grounding items, etc.

CORIGY SOLAR, 15 years experience of research, manufacture and sale of solar energy system. We are always trying to provide the best support for you, including fast response, cost, QC, design, distributor support.
Phone
0086-592-6883200Location
No.893,Haicang Avenue,Haicang District,Xiamen City,China.

 IPv6 network supported
 English
 español
 한국의
한국의